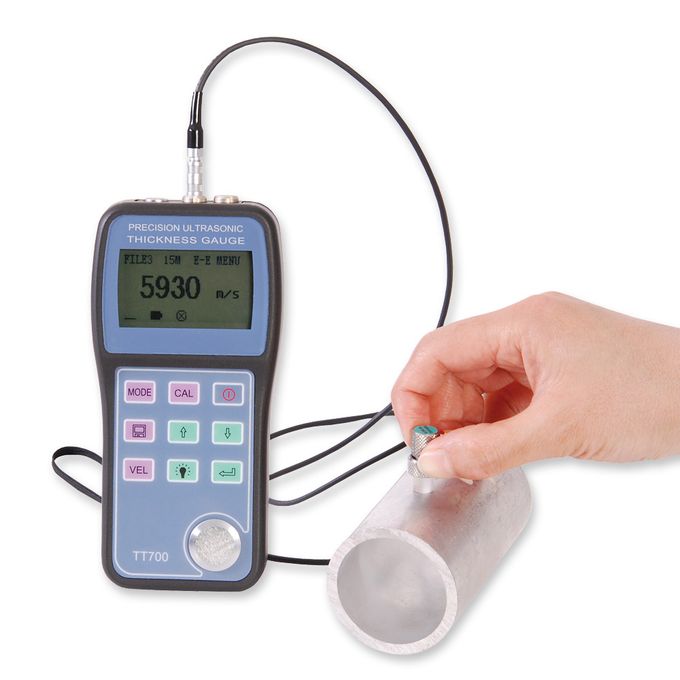
Wall thickness gauge TT700/TIME2170
High performance in a light and handy size
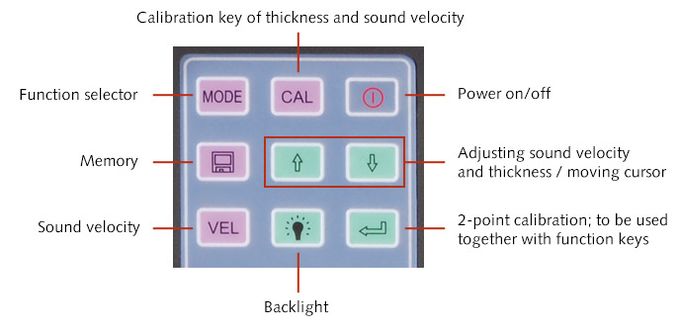
The operator keypad interface is user-friendly and has a central mode key, a calibration key, three function arrow keys to activate and set functional control and navigate through the menu plus a key to store/transfer data. It has an integrated steel calibration plate and the display resolution can be switched from 0.001 to 0.01mm. If you need to document your measuring results, they can be printed or transferred to a PC.
Features
- Super-easy keypad handling
- Integrated calibration plate
- Selectable between…
…Measurement value in mm or inch
…Display solution in 0,001 or 0,01 mm
…Sound velocity testing or single point calibration
…I-E, E-E or AUTO testing mode - I-E: For measuring thick test pieces, but the results are easily influenced by the coupling status
- E-E: For measuring test pieces up to a certain thickness limit, but the measuring result will be accuracy and stable
- AUTO: the instrument will select I-E or E-E automatically
- PC transfer and printing
- Sound alarm, backlight, shutdown after 2 minutes and differential mode are available
- Data store, view and delete
- Only 220 g
Application
- Steel plates
- Sheets of board
- Processing parts
- Various pipes and pressure vessels in production equipment
- Monitoring the thinning degree during using
- Widely used in petroleum, chemical, metallurgy, shipping, aerospace, aviation and other fields
Standard delivery range
- TT700/TIME2170 device
- Transducer 15 MHz
- AA-batteries (2 pieces)
- Instructions manual
- Service case
Optional accessory
- Communication cable for PC
- Software
- Standard test block
- Transducer 20 MHz
- Printer TA230
Specifications
All SaluTron® gauges correspond to national (DIN) and international (ISO, BS, ASTM) norms and possess the CE-sign.
Specifications are subject to change without prior notice.
| Measuring range (15 MHz / 20 MHz transducer) | 0.15 – 20.00 mm (depending on transducer and material) |
| Accuracy | Thickness (H) > 10 mm = Tolerance: +/- 0.05 mm Thickness (H) < 10 mm = Tolerance: +/- (0.5% x H) mm |
| Display solution | 0.001 mm and 0.01 mm selectable |
| Material velocity range | 1.000 – 9999 m/s or 0.039 – 0.394 in/µs |
| Environment temperature | 0 - 40°C |
| Dimensions | 152 x 74 x 35 mm |
| Weight | 220 g |
| Power supply | Working current < 30 mA (3 V without back light) |
| Power consumption | Working current < 30 mA (3 V without back light) |
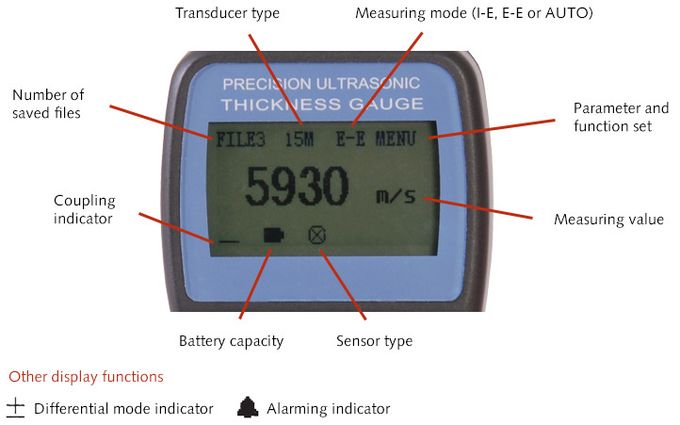
Display symbols

Keypad functions

Velocities at different materials
| Material | V (in/µs) | V (m/s) |
|---|---|---|
| Aluminium; rolled | 0,2530 | 6420 |
| Aluminium; 6061-T6 | 0,2510 | 6383 |
| Beryllium | 0,5073 | 12890 |
| Brass, 70 CU, 30 Zn | 0,1850 | 4700 |
| Copper; rolled | 0,1972 | 5010 |
| Duraluminium | 0,2487 | 6320 |
| Iron | 0,2345 | 5960 |
| Lead; rolled | 0,0771 | 1960 |
| Magnesium | 0,2270 | 5770 |
| Molybdenum | 0,2470 | 6250 |
| Monel | 0,2105 | 5350 |
| Nickel | 0,2377 | 6040 |
| Steel; normal | 0,2331 | 5920 |
| Steel; alloyed | 0,2259 | 5734 |
| Stainless steel | 0,2278 | 5790 |
| Titanium | 0,2402 | 6100 |
| Tungsten | 0,2129 | 5410 |
| Uranium | 0,1330 | 3370 |
| Zinc; rolled | 0,1657 | 4210 |
| Zinc; sprayed | 0,1756 | 4460 |
| Aluminium, AL203 99,5% | 0,4013 | 10190 |
| Quarz | 0,2349 | 5968 |
| Pyrex | 0,2220 | 5640 |
| Lucite | 0,1055 | 2680 |
| Acrylic glass | 0,1077 | 2735 |
| Nylon | 0,1031 | 2620 |
| Polyethylene | 0,0705 | 1950 |
| Polystyrene | 0,0925 | 2350 |
| Silicon rubber | 0,0373 | 0948 |
| Water | 0,0590 | 1490 |

