The gauges are easy to use and the user can make all the necessary adjustments with the aid of a menu-changes can therefore be implemented quickly and simply with a minimum amount of fuss. Both gauges have a large measuring range of 0 to 5 mm to offer and can therefore be used for a wide variety of applications. Modern electronic and the robust instrument housing guarantee an extended lifetime for the high precision instruments. These features as well as others, make the practical hand-held pocket gauges an indispensable aid in the quest for quality control and other applications.
Coating thickness gauge
SaluTron® D4 / D5
Precise coating thickness measurement on ferrous or non-ferrous substrates
The gauge SaluTron® D4 measures all non-magnetic coatings such as sythetics, lacquers, enamels, copper, chromium, zinc, etc. on steel or iron.
The gauge SaluTron® D5 measures all isolating coatings such as lacquers, synthetics, enamels, paper, glass, rubber, etc. on copper, aluminium or brass. This includes eloxal coatings on aluminium as well.
Features and equipment
- Easy to use
- Large measuring range 0.00 to 5.00 mm
- High accuracy
- Measurement type-single-point or continuous
- Vibrations do not influence the measurements
- Wear resistant, spring-loaded ruby probe
- Measurement result can be displayed in µm or mils
- Gauges can be switched on/off manually or automatically
- Visual alarm if the gauge is placed on incorrect substrate or if coating thickness exeeds the maximum range
- Integrated probe-for single-handed use
- Easy setup
- Requires no timely re-calibration for different material
- The V-groove assists in the placement of the probe on spherical surfaces (rods, pipes, etc.)
Coating thickness gauge
SaluTron® D4plus / D5plus
Features and equipment
- Infrared transmitter
- USB interface
- Memory with 8192 saving slots, apportionable up to max. 99 blocks and statistical data
Application of coating thickness gauges
- paint shops
- car insurances
- car experts/inspectors
- automotive industry
- shops
- quality control
- bridge construction
- ship construction
- stock receipt
- production processes
- laboratory
Standard delivery range
- SaluTron D4/D5 or SaluTron D4/D5 plus©
- Carrying case
- Zero plate
- Battery
- Manual
Optional accessory
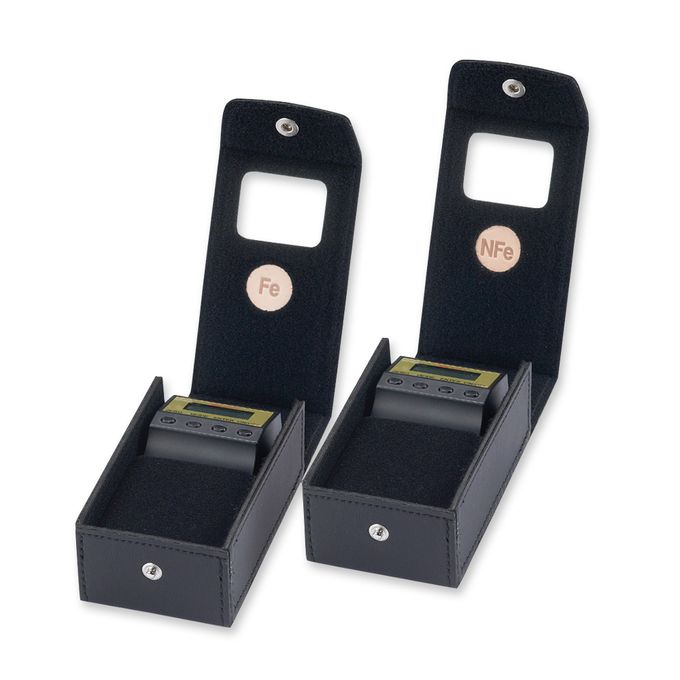
- Carrying case for both gauges SaluTron® D4 / SaluTron® D5
Optional accessory plus-Version
- Software and data transfer cable to a PC
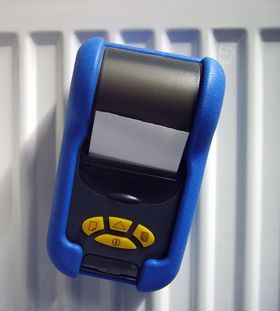
- Mini-Infrared-Printer SP100 for wireless data transfer
Downloads
Specifications
All SaluTron® gauges correspond to national (DIN) and international (ISO, BS, ASTM) norms and possess the CE-sign.
Specifications are subject to change without prior notice.
| Substrate |
| ||||
| Continuous measuring range | 0 - 5000 µm or 0 - 200 mils | ||||
| Display of measured values | 0 - 999 in µm, 1.00 - 5.00 in mm or 0 - 200 in mils | ||||
| Resolution |
| ||||
| Accuracy | ± (1,5 µm + 2%) from 0 - 999 µm ± 3.5% from 1000 - 5000 µm | ||||
| Minimum object size | 10 x 10 mm or 0.4" x 0.4" | ||||
| Minimum curvature |
| ||||
| Minimum substrate thickness |
| ||||
| Temperature range |
| ||||
| Display | 4-digit liquid crystal display (LCD) | ||||
| Probes | Single point | ||||
| Power supply | 9V E Block Alkali | ||||
| Dimension (L x W x H) | 118 x 58 x 38 mm or 4.6" x 2.3" x 1.5" | ||||
| Weight | approx. 150 g or 5.3 oz incl. battery | ||||
| Memory of measured values: (only Plus-Version) | 8192 saving slots |
Mini-Infrared-Printer SP 100

The infrared pocket printer SP 100 completes the functions of ComBi D3®. An adapter enables wireless data transfer to print out measured and statistic values.
Other features are:
- Thermal printing process
- Magnetic surface to stick on metal
- Universally applicable with other gauges
- High printing speed (one print line = 24 signs per second)
- Transfer distance from gauge to printer: up to 4.5 m
- Very robust and handy
- Size (length x width x height): only 15.5 x 9.2 x 6.5 cm or 6.1” x 3.6” x 2.5”
- Independent of mains supply (four AA Alkali-batteries)
The SP 100 sticks on metal surfaces. Two strong magnets are embedded underneath the rubber coating.

