Hardness tester HardyTest D800
Precise in all positions
The hardness testing device HardyTest D800® belongs to the high-end class in mobile hardness measurement technology. It was developed to meet all requirements in professional hardness testing.
The HardyTest D800® is suitable for almost all hardness measurements on ferrous and non-ferrous metals using 6 impact devices. This hardness tester has proven to be very reliable for use in the power plant industry, petrochemical industry, apparatus, vehicle and mechanical engineering, quality control, steelworks, and more.
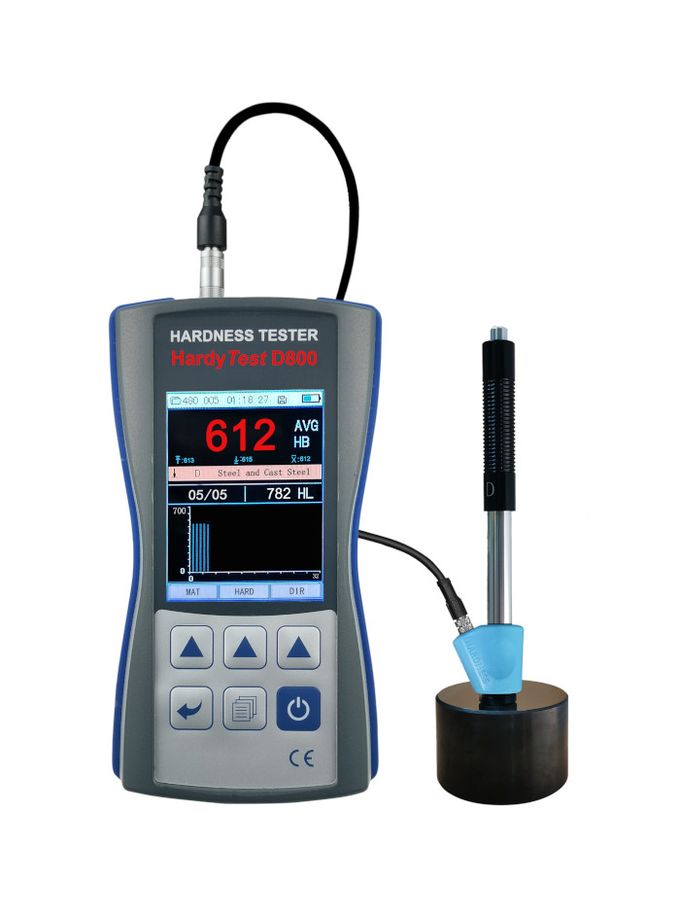
The following is displayed on the generous color display:
- Measurement result
- Graphic with bar chart
- Material of the test piece / type of impact device / direction of impact
- Maximum / Minimum / Mean value
- Memory position / Number of measurements / Date with time
Characteristics and equipment
- stable handheld device
- high accuracy
- for all metallic materials
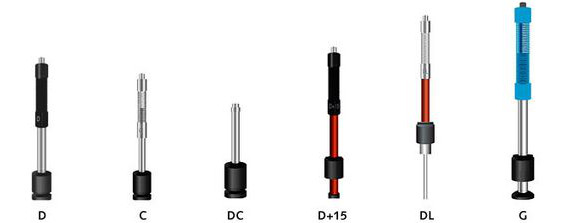
- with 6 applicable impact devices
- for measurements in any position
- large measuring range
- measurement series with averaging between 1-32 measurements grouped in up to 510 measurement blocks/groups
- easy operation
- large graphic color display
- Bluetooth and USB interface
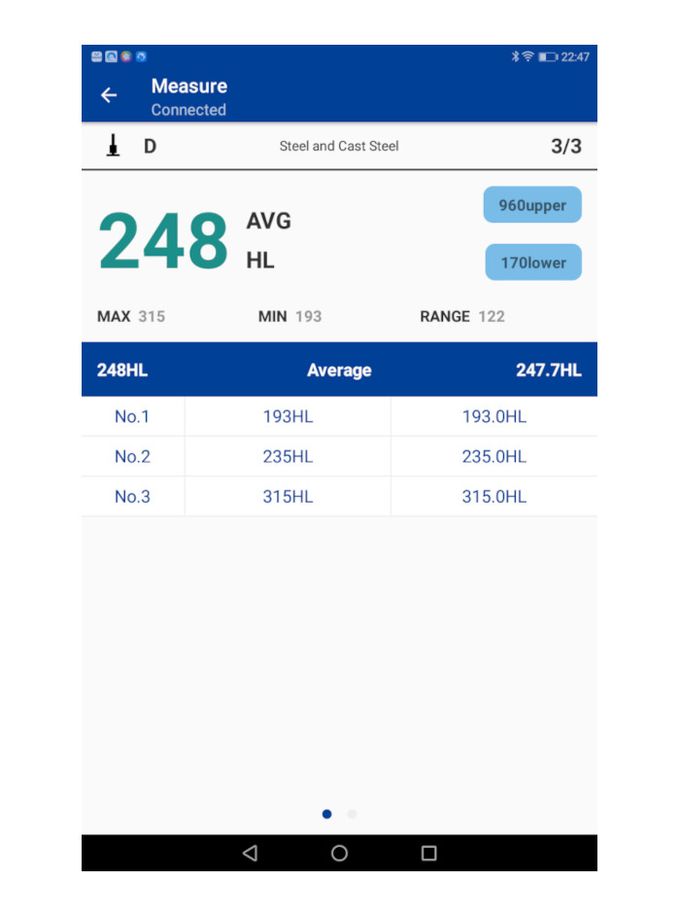
- user-friendly data acquisition program for WINDOWS PC and Android devices
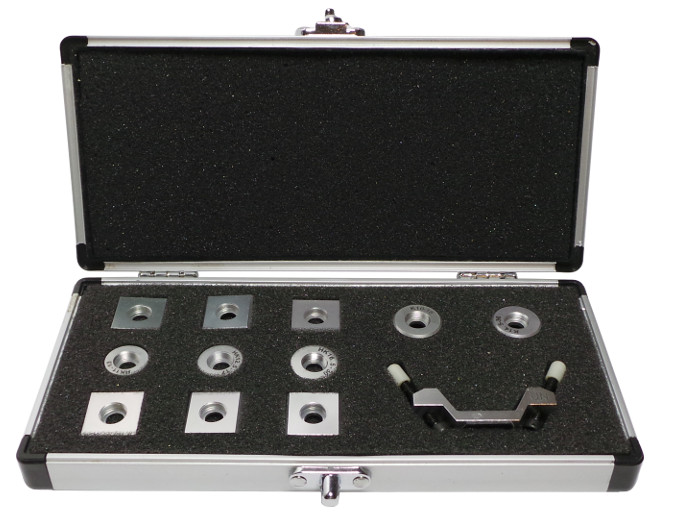
- impact caps (12 pieces) for convex and concave surfaces
- compliant with ASTM A 956
Areas of application for hardness testing devices
- Manufacturing of metallic components as well as rubber components
- Mechanical engineering
- Research and development
- Solid state physics
Standard delivery range
- Device HardyTest D800® unit with impact device type D
- Test block approx. 800 HLD
- Cleaning brush
- 3 x 1.5V AAA batteries
- Sturdy service case
- USB stick with software
- USB transfer cable to PC
- User manual
Optional accessory
- Additional impact devices
- Set of support rings for measurements on curved surfaces with a radius of less than 30 mm. Facilitate optimal positioning on the test piece. Available in 12 different variations
- Bluetooth mini printer
Specifications
All SaluTron® gauges correspond to national (DIN) and international (ISO, BS, ASTM) norms and possess the CE-sign.
Specifications are subject to change without prior notice.
| Display | 320 x 240 TFT color liquid crystal display |
| Precision | ± 0,5 % (for HL = 800) |
| Measurement range | see table |
| Functions | Automatic detection of the impact devices D, DC, D+15, C, G, DL and display with conversion into other hardness units |
| Memory | Series of measurements grouped with averaging between 1-32 measurements in up to 510 measurement blocks/groups |
| Statistics | Mean value, min./max., limit values, histogram |
| Display of hardness units | HL (Leeb), HRB (Rockwell B) HRC (Rockwell C), HV (Vickers), HB (Brinell), HS (Shore D) |
| Impact devices | D (standard) for further impact devices see table |
| Interface | USB and Bluetooth |
| Work piece radius | Rmin = 30 mm (with Support ring Rmin = 10 mm) |
| Min. weight of specimen | 2 kg with gel on stable base, 5 kg solid material |
| Min. thickness of specimen | 3 mm with gel (impact device G: 10 mm) |
| Min. hardness depth | 0.8 mm |
| Depth of indentation | see user manual |
| Power supply | 3 batteries AAA 1.5 V |
| Dimensions (L x W x H) | 140 x 80 x 35 mm |
| Ambient temperature | from +5°C to +50°C |
| Weight | 200 g (with batteries without impact device) |
Test work pieces and hardness units
The ranges correspond to the limits applied in static test methods.
Specifications are subject to change without prior notice.
| Material | Hardness unit | Impact device | |||||
|---|---|---|---|---|---|---|---|
| D/DC | D+15 | C | G | E | DL | ||
| Steel and cast steel | HRC | 20-68.5 | 19.3-67.9 | 20.0-69.5 | - | 22.4-70.7 | 20.7-58.7 |
| HRB | 38.4-99.6 | - | - | 47.7-99.9 | - | - | |
| HB | 127-651 | 80-638 | 80-683 | 90-646 | 83-663 | 81-646 | |
| HV | 83-976 | 80-937 | 80-996 | - | 84-1042 | 80-881 | |
| HS | 32.2-99.5 | 33.3-99.3 | 31.8-102.1 | - | 35.8-102.6 | - | |
| Cold work tool steel | HRC | 20.4-67.1 | 19.8-68.2 | 20.7-68.2 | - | 22.6-70.2 | - |
| HV | 80-898 | 80-935 | 100-941 | - | 82-1009 | - | |
| Hammered steel | HB | 143-650 | - | - | - | - | - |
| Stainless steel | HRB | 46.5-101.7 | - | - | - | - | - |
| HB | 85-655 | - | - | - | - | - | |
| HV | 85-802 | - | - | - | - | - | |
| Grey cast iron | HRB | - | - | - | - | - | - |
| HB | 93-334 | - | - | 92-326 | - | - | |
| HV | - | - | - | - | - | - | |
| Nodular cast iron | HRC | - | - | - | - | - | - |
| HB | 131-387 | - | - | 127-364 | - | - | |
| HV | - | - | - | - | - | - | |
| Cast aluminum alloys | HB | 19-164 | - | 23-210 | 32-168 | - | - |
| HRB | 23.8-84.6 | - | 22.7-85.0 | 23.8-85.5 | - | - | |
| Brass | HB | 40-173 | - | - | - | - | - |
| HRB | 13.5-95.3 | - | - | - | - | ||
| Bronze | HB | 60-290 | - | - | - | - | - |
| Wrought copper alloys | HB | 45-315 | - | - | - | - | - |
Impact devices
Specifications are subject to change without prior notice.

| Type of impact device | D, DC, DL | D+15 | C | G | ||
|---|---|---|---|---|---|---|
| Impacting energy | 11 mJ | 11 mJ | 2.7 mJ | 90 mJ | ||
| Mass of impact body | D+DC: 5.5 g DL: 7.2 g | 7.8 g | 3.0 g | 20.0 g | ||
| Test tip hardness | 1600 HV | 1600 HV | 1600 HV | 1600 HV | ||
| Dia. test tip | 3 mm | 3 mm | 3 mm | 5 mm | ||
| Material of test tip | Tungsten carbide | Tungsten carbide | Tungsten carbide | Tungsten carbide | ||
| Impact device diameter | 20 mm | 20 mm | 20 mm | 30 mm | ||
| Impact device length | D: 147 mm DC: 86 mm DL: 202 mm | 162 mm | 141 mm | 254 mm | ||
| Impact device weight | 50 g | 80 g | 75 g | 250 g | ||
| Max. hardness of sample | 940 HV | 940 HV | 1000 HV | 650 HB | ||
| Mean roughness value of sample surface Ra | 1.6 µm | 1.6 µm | 0.4 µm | 6.3 µm | ||
| Min. weight of sample | ||||||
| Measure directly | > 5 kg | > 5 kg | > 1.5 kg | > 15 kg | ||
| Needs support firmly | 2-5 kg | 2-5 kg | 0.5-1.5 kg | 5-15 kg | ||
| Needs coupling tightly | 0.05-2 kg | 0.05-2 kg | 0.02-0.5 kg | 0.5-5 kg | ||
| Min. thickness of sample | ||||||
| with tight coupling | 5 mm | 5 mm | 1 mm | 10 mm | ||
| Min. layer thickness for surface hardening | ≥ 0.8 mm | ≥ 0.8 mm | ≥ 0.2 mm | ≥ 1.2 mm | ||
| Size of tip indentation | ||||||
| Hardness 300 HV | Indentation diameter | 0.54 mm | 0.54 mm | 0.38 mm | 1.03 mm | |
| Depth of indentation | 24 µm | 24 µm | 12 µm | 53 µm | ||
| Hardness 600 HV | Indentation diameter | 0.54 mm | 0.54 mm | 0.32 mm | 0.90 mm | |
| Depth of indentation | 17 µm | 17 µm | 8 µm | 41 µm | ||
| Hardness 800 HV | Indentation diameter | 0.35 mm | 0.35 mm | 0.35 mm | - | |
| Depth of indentation | 10 µm | 10 µm | 7 µm | - | ||
| Available type of impact device | ||||||
| Impact device D | Universal device for most hardness requirements | |||||
| Impact device DC | Ultra-short version; manually loaded on the front; same characteristics as type D; for testing in boreholes, built-in parts, hollow cylindrical parts, etc. | |||||
| Impact device DL | With extremely long and fine front piece only for steel and cast steel; for testing in narrow or hard to reach areas | |||||
| Impact device D+15 | The front part is narrow and the coil is located behind it; same characteristics as type D; only for steel; for hardness testing in slots, grooves, recessed areas, gear flanks, grooves, cavities, tooth flanks, etc. | |||||
| Impact device C | Reduced impact energy of about ¼ of type D; for tempered or surface treated steel, small or sensitive-to-shocks parts (minimal imprint is left) | |||||
| Impact device G | With large test-tip diameter; impact energy 9 times larger than type D; on steel, gray or nodular cast iron; for large cast parts and forgings or parts with high surface roughness | |||||
| Type of impact device | Hardness value of standard Leeb hardness block | Error of displayed value | Repeatability of displayed value |
|---|---|---|---|
| D | 760±30 HLD 530±40 HLD | ±6 HLD ±10 HLD | 6 HLD 10 HLD |
| DC | 760±30 HLDC 530±40 HLDC | ±6 HLDC ±10 HLDC | 6 HLD 10 HLD |
| DL | 878±30 HLDL 736±40 HLDL | ±12 HLDL | 12 HLDL |
| D+15 | 766±30 HLD+15 544±40 HLD+15 | ±12 HLD+15 | 12 HLD+15 |
| G | 590±40 HLG 500±40 HLG | ±12 HLG | 12 HLG |
| C | 822±30HLC 590±40HLC | ±12 HLC | 12 HLC |
Supporting rings
Specifications are subject to change without prior notice.

| No. | Code | Type | Sketch | Remarks |
|---|---|---|---|---|
| 1 | 03-03.7 | Z10-15 |  | For testing cylindrical outside surface R10-R15 |
| 2 | 03-03.8 | Z14.5-30 | For testing cylindrical outside surface R14.5-R30 | |
| 3 | 03-03.9 | Z25-50 | For testing cylindrical outside surface R25-R50 | |
| 4 | 03-03.10 | HZ11-13 |  | For testing cylindrical inside surface R11-R13 |
| 5 | 03-03.11 | HZ12.5-17 | For testing cylindrical inside surface R12.5-R17 | |
| 6 | 03-03.12 | HZ16.5-30 | For testing cylindrical inside surface R16.5-R30 | |
| 7 | 03-03.13 | K10-15 |  | For testing spherical outside surface SR10-SR15 |
| 8 | 03-03.14 | K14.5-30 | For testing spherical outside surface SR14.5-SR30 | |
| 9 | 03-03.15 | HK11-13 |  | For testing spherical inside surface SR11-SR13 |
| 10 | 03-03.16 | HK12.5-17 | For testing spherical inside surface SR12.5-SR17 | |
| 11 | 03-03.17 | HK16.5-30 | For testing spherical inside surface SR16.5-SR30 | |
| 12 | 03-03.18 | UN |  | For testing cylindrical outside surface, radius adjustable R10-∞ |


