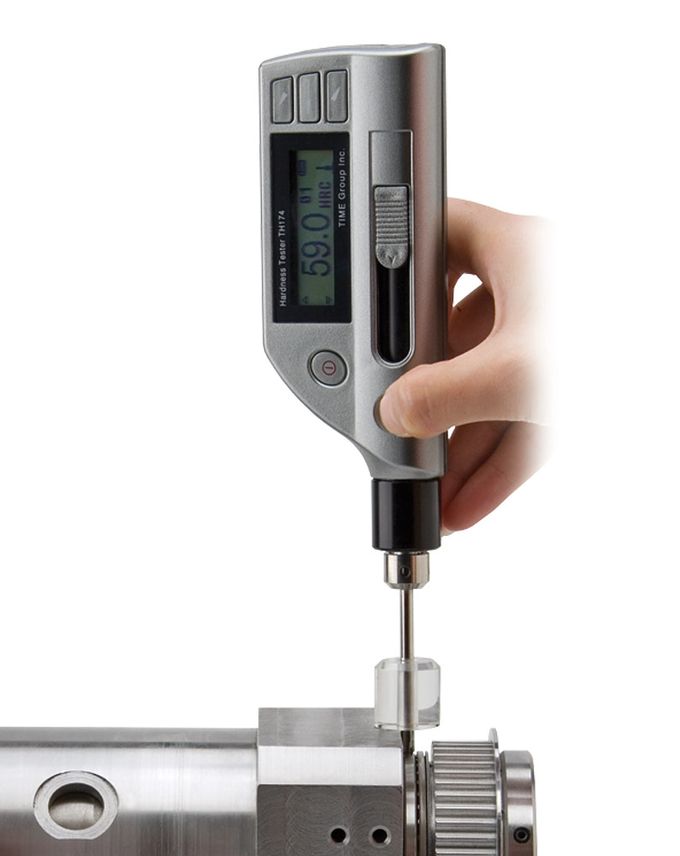
Universal hardness tester
TH-174/TIME5104
Quick and easy
The hardness testers of the TH-series are especially suitable for quick and easy hardness measurements.
They are applicable with almost all hardness measurements on ferrous and non- ferrous metals. Costumers of the product include the power industry, petrochemical industry, apparatus-, automotive- and mechanical-engineering, quality control, steelworks and many more.
Features and equipment
- For fast, on site hardness testing
- Integrated impact device DL
- Hardness units: HL (Leeb), HB (Brinell), HRC (Rockwell C), HV (Vickers)
- Large measuring range: 560-940 HLD / 80-881 HV on steel
- Storage capacity up to 270 readings divisible into 9 blocks
- Length of the front part: 50 mm , Ø = 4.2 mm
- PC data transfer via USB
- Adjustable display illumination
- High accuracy: up to ± 12 HLDL
- Automatic shutdown
- Automatic impact direction detection
- Deletion of data automatically or manually
- Limit setting (min. and max. adjustable with an arrow that indicates when limits are exceeded)
Application
Fixtures, dies, molds, large parts, narrow spaces, axles, steering knuckles, frames, etc. Furthermore the device is often used for material identification, and for error checking in pressure vessels and steam turbines. The great advantage of the TH-174/TIME5104 is the availability of getrting to narrow, very difficult to reach parts.
Application area
- Production of metal and rubber components
- Mechanical engineering
- Research and development
- Solid state physics
Standard delivery range
- TH-174/TIME5104 with integrated impact device type DL
- Test block (approximately 800 HLD converted to HLDL)
- Batteries
- Cleaning brush
- Instructions manual
- Carrying case
Optional accessory
- Software with USB cable
- Test blocks UKAS certified with any hardness parameter
Specifications
All SaluTron® gauges correspond to national (DIN) and international (ISO, BS, ASTM) norms and possess the CE-sign.
Specifications are subject to change without prior notice.
| Hardness parameter | HRC, HV, HB, HLDL |
| Measuring range / metallic materials | See table |
| Accuracy | Within ± 12 HLDL |
| Statistics | Average (max. 99) |
| Output | USB 2.0 |
| Impact device | DL integrated |
| Min. Surface roughness of workpiece | 1.6 µm (Ra) |
| Workpiece max. hardness value | 940 HLDL |
| Workpiece radius (convex/concave) | Rmin = 10 mm |
| Workpiece minimum weight | 2 kg on solid support (0,1 kg with couplant paste) |
| Workpiece min. thickness coupled | 5 mm |
| Workpiece min. case hardened depth | 0,8 mm |
| Indentation depth | 300 HV=24 µm, 600 HV=17 µm, 800 HV=10 µm |
| Power | 2 x AAA 1.5 V batteries |
| Operating temperature | 0°C to 40°C |
| Overall dimensions | 210 mm x 24 mm x 55 mm |
| Weight | 200 gr |
Test work pieces and hardness units
The ranges are stipulated by the application limits of the relevant static procedure.
| Test work pieces | Hardness units | |||||
|---|---|---|---|---|---|---|
| HLDL | HB | HRC | HV | |||
| Steel | 560 - 940 | 81 - 646 | 21 - 59 | 80 - 881 | ||

