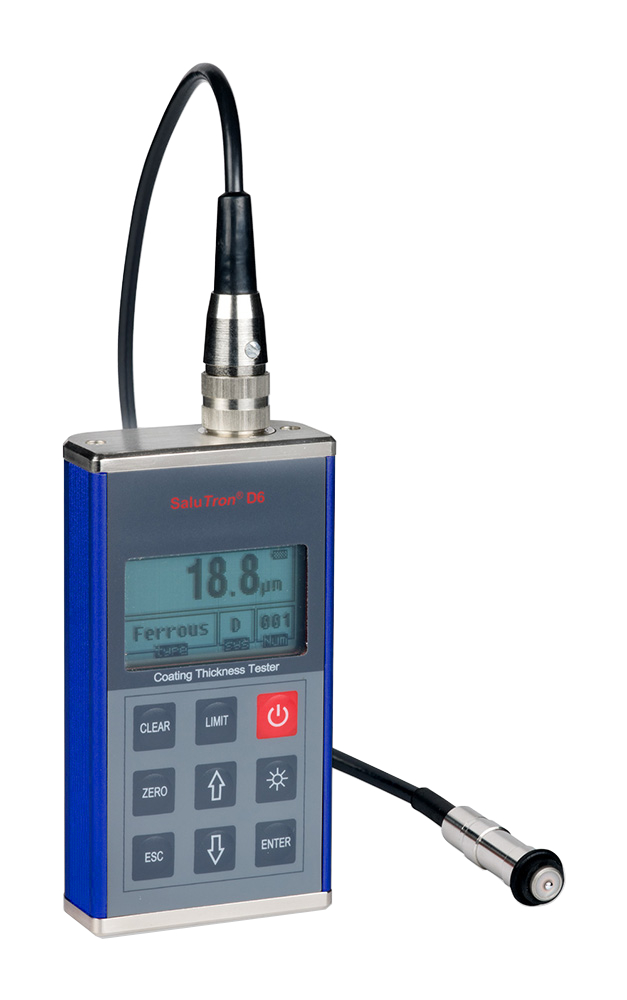
Coating thickness gauge
SaluTron® D6
Combination gauge with 3 Fe- and 2 NFe interchangeable probes
With Fe-probes (F400, F1 and F10) you can measure non-magnetic coatings such as paints, plastics, chromium, copper, zinc, enamel, etc. on metal substrates as steel or iron.
With the NFe-probes (N1 and CN02) you can measure non-conductive layers such as paints, enamels, plastics, rubber, glass, paper, etc. on non-magnetic metal substrates as aluminum, copper, brass, zinc and certain grades of stainless steel. You can also measure anodized aluminum.
Measuring features
- Measuring range of 0-1250 micron (F1 standard probe)
- Measuring range of 0-10 mm (F10 special probe)
- High accuracy
- Switch between mil and micron
- Upper and lower limits can be preset; with visual and audible alarm when exceeding
- 2 measuring modes: continuing mode and single mode
- 2 operation modes: direct mode with 99 storage places and batch mode with 495 locations (5 blocks with 99 values each)
- Automatic recognition of the probes
- Quick calibration and zeroing of the instrument
- 2 methods for calibration; error system of the probe can be corrected with basic calibration method
Functions
- Statistic values: mean, minimum, maximum, number of measurements, standard deviation
- Switch between manual or automatic memory
- Delete function: single data or all data in memory
- Analysis of measured values via histogram
- Acoustic signal after each measurement / buttons beep adjustable
- Backlight
- Low battery indicator
- Automatic or manual shutdown
- Transfer of results to PC
Application of coating thickness gauges
- paint shops
- car insurances
- car experts/inspectors
- automotive industry
- shops
- quality control
- bridge construction
- ship construction
- stock receipt
- production processes
- laboratory
Standard delivery range
- SaluTron D6©
- Fe (F1) - or NFe (N1)-probe
- 5 Standard test plates
- 1 Substrate
- Stable service case
- Manual
- USB cable and software for PC transfer
Optional accessory
- additional Fe- and NFe-probes (see "Probes")
Specifications
All SaluTron® gauges correspond to national (DIN) and international (ISO, BS, ASTM) norms and possess the CE-sign.
Specifications are subject to change without prior notice.
| Probe model | F1 | Special probe F10 | F400 | N1 | CN02 |
|---|---|---|---|---|---|
| Base material (substrate) | iron or steel | non-magnetic metals such as aluminum, zinc, copper, brass, some stainless steel grades | |||
| Layers | paints, lacquers, plastics, chromium, copper, zinc, enamel, etc. (non-magnetic) | anodized aluminum, lacquer, enamel, plastics, paper, glass, rubber, etc. (non-conductive) | |||
| Function principle | magnetic induction | eddy current | |||
| Measuring range | 0-1250 µm (0-1.25 mm) 0-49 mil | 0-10000 µm (0-10 mm) 0-394 mil | 0-400 µm (0-0.4 mm) 0-16 mil | 0-1250 µm (0-1.25 mm) 0-49 mil | 10-200 µm (0.01-0.2 mm) 4-8 mil |
| Resolution | 0.1 µm | 10 µm | 0.1 µm | 0.1 µm | 1 µm |
| Accuracy (H=nominal value) | |||||
| One-point-calibration | ±(3%H+1) µm | ±(3%H+10) µm | ±(3%H+1) µm | ±(3%H+1.5) µm | ±(3%H+1) µm |
| Two-point-calibration | ±((1-3)%H +1) µm | ±((1-3)%H +10) µm | ±((1-3)%H +0.7) µm | ±[(1-3)%H +1.5] µm | --- |
| Measuring conditions | |||||
| Min. curvature radius | 1.5 mm | 10 mm | convex / 1 mm | 3 mm | only flat |
| Diameter of minimum area | Ø 7 mm | Ø 40 mm | Ø 3 mm | Ø 5 mm | Ø 7 mm |
| Critical thickness of substrate | 0.5 mm | 2 mm | 0.2 mm | 0.3 mm | no limit |
SaluTron D6
| Memory capacity | Direct mode with 99 storage places and batch mode with 495 locations (5 blocks with 99 values each) |
| Memory mode | Automatically or manually |
| Measuring unit | Mil or µm |
| Limits | Minimum and maximum can be preset; with visual and audible alarm when exceeding |
| Statistic values | Mean, minimum, maximum, number of measurements, standard deviation |
| Delete function | Single data or all data in memory |
| Error warning | Visually or acoustically |
| Probe recognition | Automatic |
| Calibration methods | 2-point or zero calibration |
| Menu and manual language | English |
| Buttons beep | adjustable |
| Backlight | adjustable |
| Shutdown | manually or automatically |
| Battery capacity indicator | available |
| Power supply | 2 x 1.5 V Mignon Alkali |
| Size | 125 x 65 x 30 mm or 4.7" x 2.6" x 0.9" |
| Weight | 340 g (with batteries) or 11 oz |

